Security#
Warning
Before you can use the API of LDP, you must have an activated user account (getting started) and create an access token for use in your client application.
Creating access tokens#
By creating an access token and allowing it to be used by an external application to access the API, you imply that you trust the external application to connect to the API on your behalf. Using the steps below you can create an access token and give it specific permissions for groups and repositories.
Access Tokens can be created either from your user settings, or from group or repository settings where you are a manager or owner of the group. Tokens created in your user settings allow you to grant access to any groups and respositories which you as a user have access to, up to the permission level which your user holds on those groups or repositories. Tokens created in a group or repository's settings are not tied to a specific user, but simply grant the selected permission level to the group or repository on which they are created.
Access tokens in user settings#
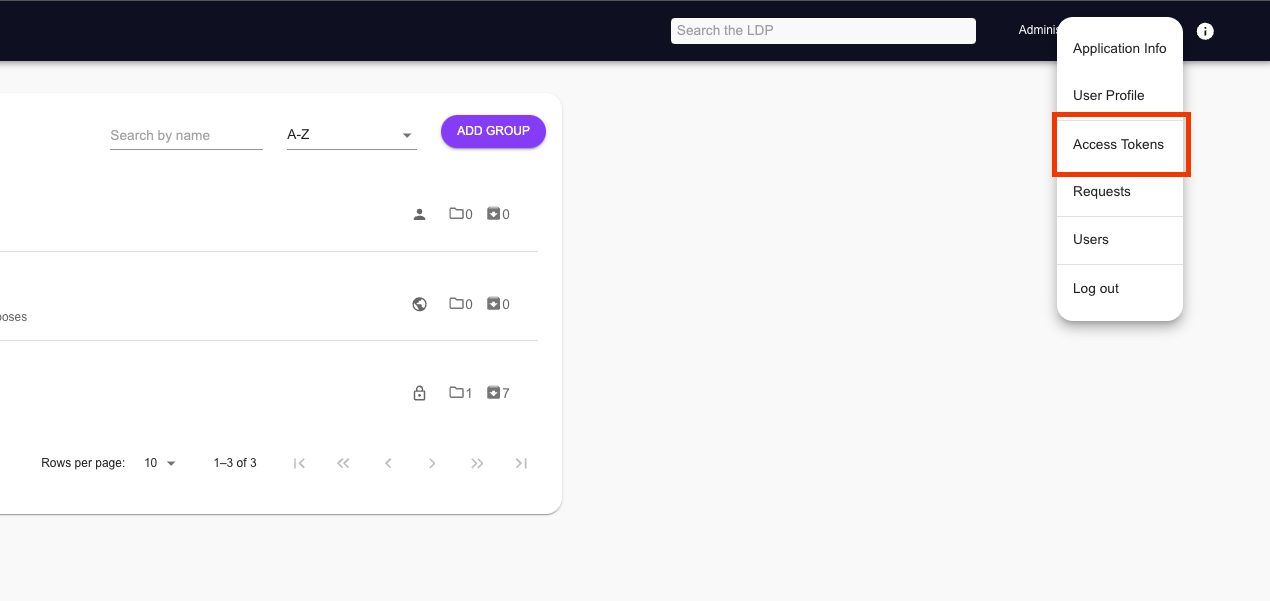
Click on your user profile icon in the top right corner, and select the "Access Tokens" menu option.
Within the access tokens overview page, click on the "Add Access Token" button below the list of access tokens.

Provide the necessary details for your new access token:
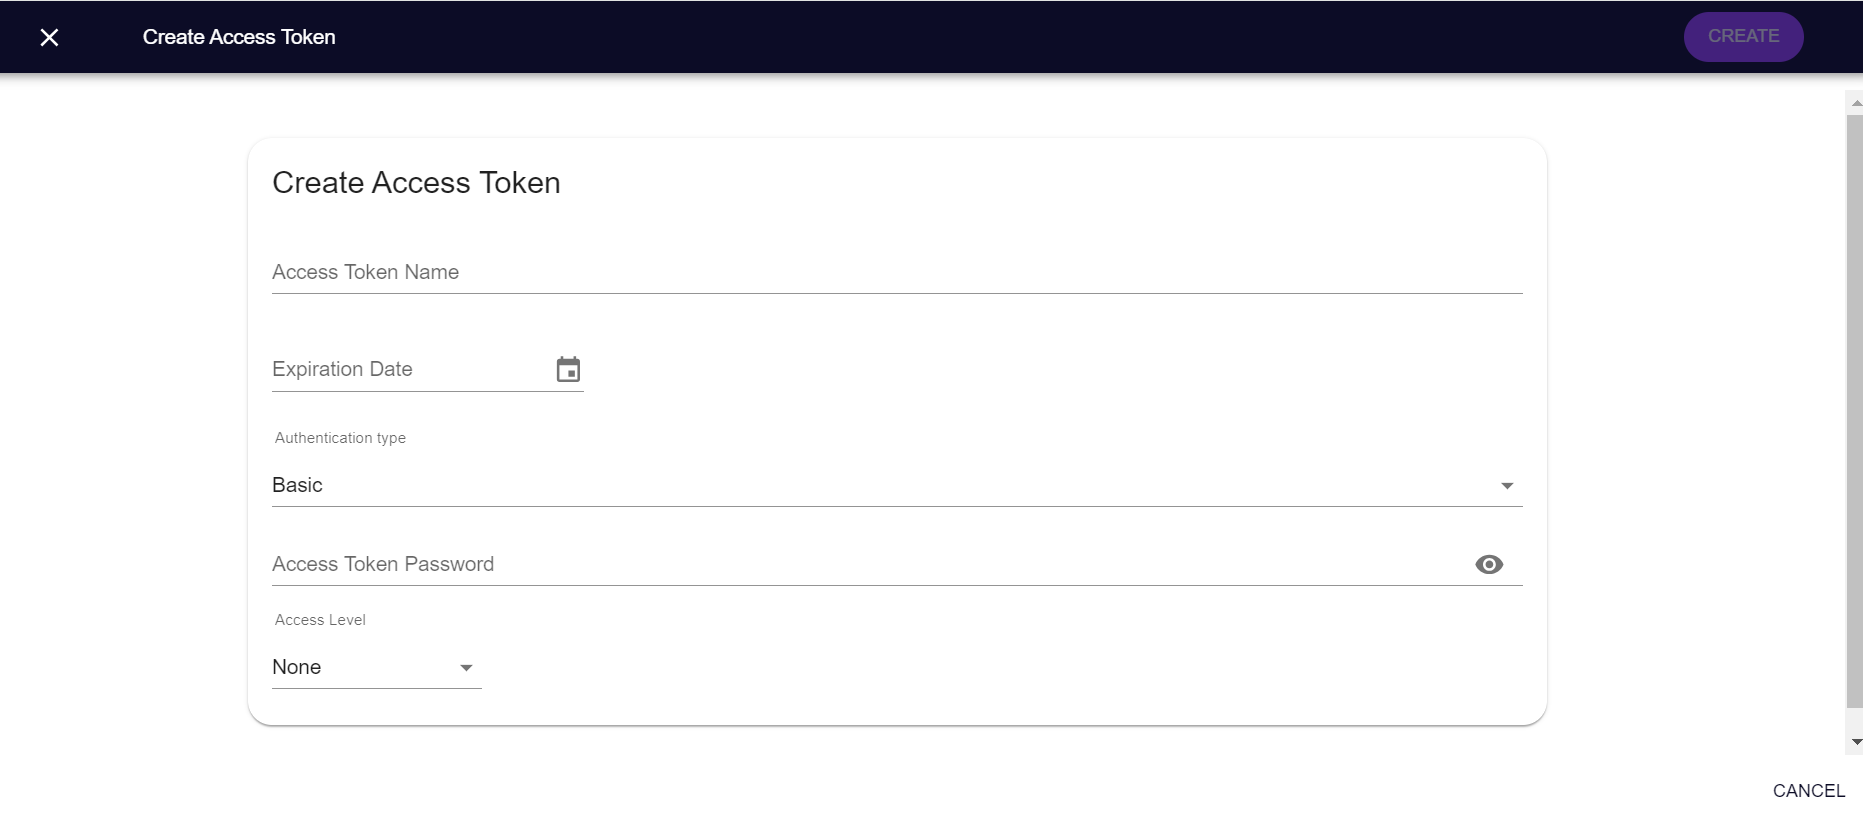
- Token name: A descriptive name to identify your token later
- Expiration date: Choose a date on which you want the token to expire
- Authentication type: Either BASIC or LACES_TOKEN
- Token password (only BASIC): The password which will be used by the token, see basic authentication.
- Token public key (only LACES_TOKEN): The public key of a public/private key pair. This field must only contain the base64 encoded key and no other text. Refer to section on Create RSA Key-pair for details on how to manually create a public (and private) key.
- Generate key pair: By checking this option, the platform will create a unique key pair for you.
Warning
Make sure you copy the private key for later, as it will not be stored and therefore cannot be retrieved later.
- Permissions: Select the permissions you want for your new access token on each group or repository. These permissions are by default all set to 'none', to avoid that users accidentally provide too many permissions to a token.
Access Tokens in group or repository settings#
As a user who is manager or owner of a group or repository, navigate to the group or repository on which you want to add the access token.
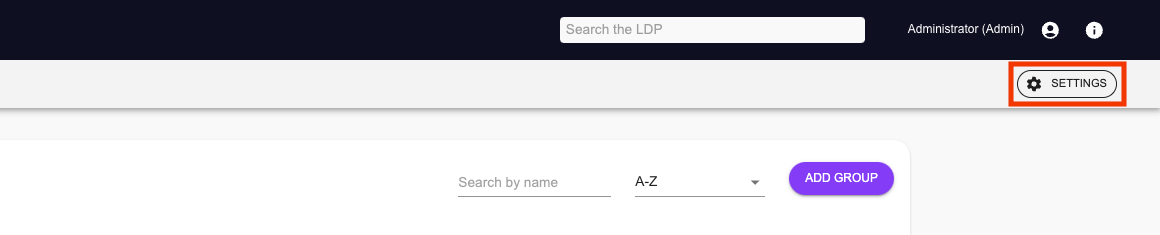
Click the "Settings" button in the top right corner of the screen.
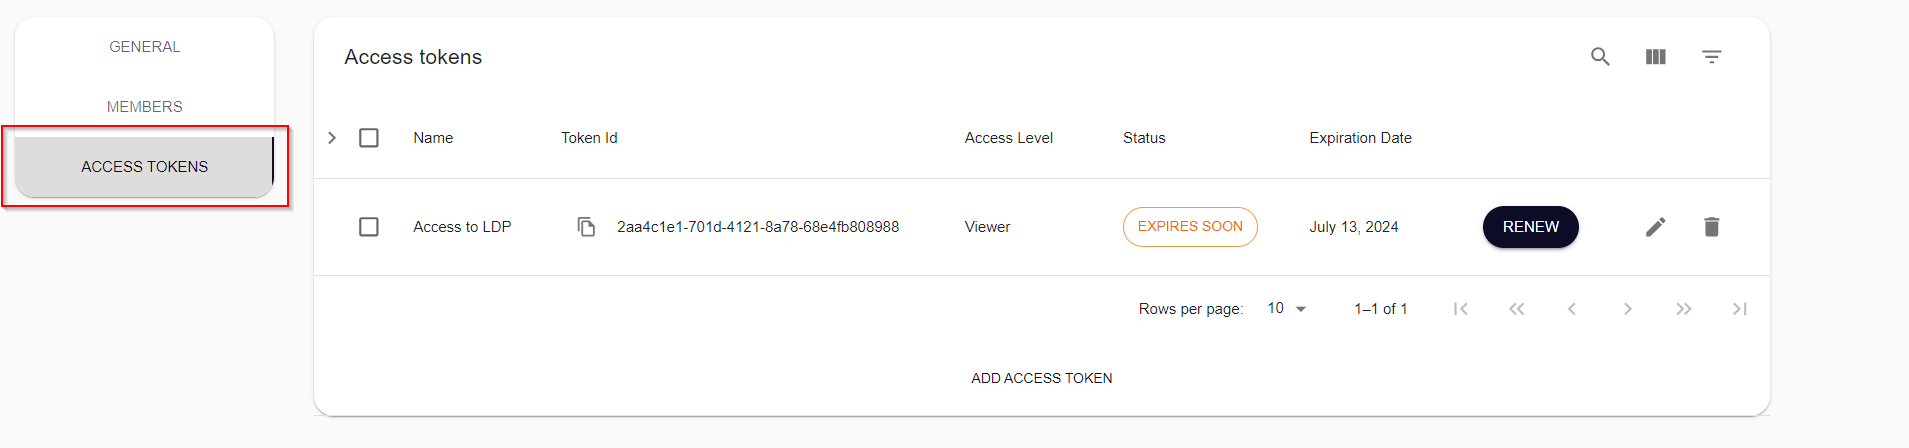
Click the "Access Tokens" tab on the left-hand side.
From here, the procedure is the same as for User Access Tokens, except that you will only be able to set a single permission per access token, which applies to the group or repository on which you are creating the access token.
Renewing an expired token#
If an expiration date is assigned to an access token during its creation, the user or group administrators will receive an email notification 7 days before the token's expiry. From this time onward, the access token can be renewed. On the access tokens overview page, tokens nearing expiry will display an "Expires soon" status (1). To renew an access token, click on "renew" (2) and fill in the required details.

Warning
When an access token is renewed, the token id will be updated. Configured applications must be updated with the new token id to maintain access to publications.
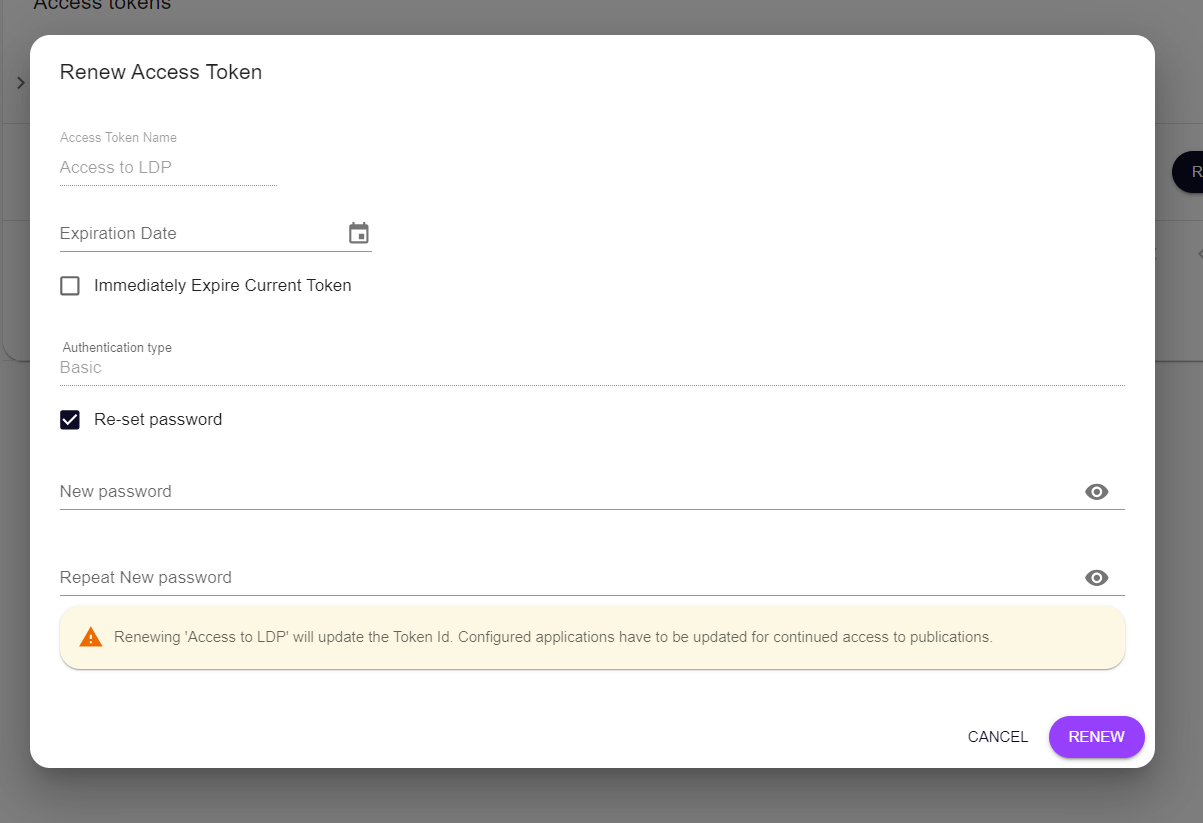
During the renewal process, users can choose whether the token should immediately expire or expire on the preset date. Users also have the option to reuse the current password or set a new one.
Note
It is recommended to reset the password when renewing the token for security reasons.
If an access token is renewed with an expiry set for a later date, the old version of the token will still be visible. Before the preset date, it is possible to force the token to expire by clicking on "expire."

Permissions#
While registering your access token, you can grant the token permissions on any group or repository for which you have permissions. Based on your personal permissions, you can either select the same permission, more strict permission, or no permission at all. The permissions tree shows all groups and repositories which you can access. If you grant certain permissions to a group, all the subgroups and repositories below will automatically receive the same permissions. It is possible to add higher permissions to a specific subgroup or repository. However, groups and repositories can never have less permissions than their parent group.
You can grant the following roles to your access token:
- None: no access
- Viewer: read-only permission
- Publisher: read and write permissions
- Manager: full administrative permissions
After filling in all the necessary details and clicking on "Create", the access token will be created and you will be presented with a "Token ID". You can copy this ID using the "Copy to clipboard" button, as you will need this later when authenticating to the Platform from within your external application.

After registration, the token will appear in your list of Access Tokens. From that point on the token can perform authorized requests to the platform on your behalf, based on the provided permissions.
After this step you are set up to start accessing services of the Laces Platform from your external application.
In order to revoke permissions to an external application which is using an Access Token you have created, log into the Laces Data Platform, navigate to your Access Tokens, and press the Delete button in the row next to the token you wish to remove.
Authentication#
The two authentication methods, using Basic- and Token Authentication, both require you to create an access token. Once created, you should have an token ID and either a password or private-public key-pair.
Note
Once an access token is created with a specific authentication mechanism, the authentication type cannot be changed. If a different authentication method is required, a new token must be created.
Basic authentication#
The easiest way to connect to the Platform is using Basic Access Authentication. This form of authentication uses a standard HTTP Header Authorization for which the value should be constructed in the following manner:
- The username and password are combined with a single colon (
:) - The resulting string is encoded using a variant of Base64
- The authorization method
Basicand a space are then prepended to the encoded string
In case of a username "token-id" and password "supersecret", we would need to use the following header and value:
Authorization: Basic dG9rZW4taWQ6c3VwZXJzZWNyZXQ=
Since the base64 encoding of token-id:supersecret is dG9rZW4taWQ6c3VwZXJzZWNyZXQ=.
Note
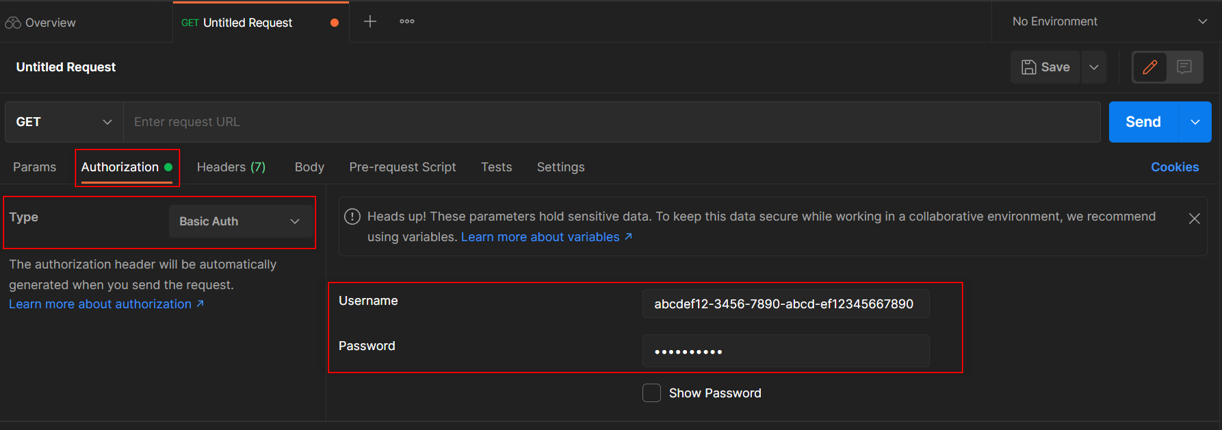
Although we use the username token-id in the example above, your token's username is equal to its token ID (e.g. abcdef12-3456-7890-abcd-ef12345667890) which can be found in the list of access tokens or on its details page and copied using the "Copy" button.
Warning
Since the username and password, although encoded in Base64, are transmitted in plain text, anybody who intercepts the request can recover these credentials. Therefore it is important to always use a secure (HTTPS) connection when using this form of authentication.
Some HTTP (REST) clients support this form of authentication out of the box and will take away all complexity of constructing and providing this header in your requests. In case of Postman you simply open the "Authorization" tab of a request and select "Basic Auth" from the Type dropdown. Then you simply fill in your username and password.
Token authentication (advanced)#
In this case each request to the REST API is authenticated using public-key cryptography. For this, a public/private key pair should be generated: the public key should be registered on the platform and the private key should be used to generate an authentication token (and should be kept secret!).
The way in which this type of cryptography works, is that anybody can check the validity of the provided token using the "known" public key, but only the holder of the private key is able to generate a valid token.
While creating your access token, you can either provide a valid public key, for which you hold the private key; or you can generate a pair directly on the page, of which only the public key is stored (and you should copy and store the private key yourself). Want to know how how to create a key pair by yourself? Check out creating RSA Key-pair.
When copying and pasting the keys, make sure to remove any lines starting with "-----BEGIN" or "-----END", including any newline characters.
Every application must sign their requests with an valid token, which is calculated using RSA cryptography. The requesting application uses its private key to create a signature, which is then added as the authentication token. Upon receiving this token, the platform will then validate the token using the known public key.
The authentication token should be provided within the Authorization header of the request, and its value should start with the text "semmtech-access-token":
semmtech-access-token tokenId="{tokenId}", signature="{signature}"
Following this token, two key-values are provided. Here, the {tokenId} must match the ID provided during creation of
your access token in the Laces Platform (see above). The {signature} is the signature generated from the relative
request URL for the current request, using an asymmetric encryption algorithm. We now support two algorithms: SHA-256
with RSA and SHA-1 with RSA.
Generating a signature with SHA-256 (Recommended):#
- Use the SHA-256 hashing algorithm to produce a digest from the relative URL you wish to query.
- Encrypt the hash using the RSA encryption algorithm with your registered public/private key pair.
- Base-64 encode the result of the encryption to yield the signature.
Generating a signature with SHA-1 (Supported for backward compatibility):#
- Use the SHA-1 hashing algorithm to create a digest from the relative URL.
- Follow the same encryption and encoding process as described for SHA-256.
Both SHA-256 and SHA-1 with RSA are currently supported, but we encourage the use of SHA-256 for enhanced security. While SHA-1 remains available, we recommend transitioning to SHA-256 to align with modern security practices.
Below is an HTTP example of calling the service located on the LDP hosted at
https://hub.laces.tech
The call is done from within the application, which has as its token ID "3bb7f45d-1adf-437a-affa-ae783e779a18". To retrieve a list of top-level groups, accessible to the access token, we call the API with:
GET /api/v4/groups HTTP/1.1
Host: hub.laces.tech
Authorization: semmtech-access-token tokenId="195331be-05d8-4f1c-b69e-1a437c5c3d91", signature="WLIoyDcU+Jh.....4rX+QokXt0fyw4qdtjdJldmLFSU3uryI2GQ3xj0="